Showing posts with label Emboss. Show all posts

Sunday, May 29, 2011

Tip of the Week - Make your own embossing folder


Well - I have been wanted to do this for quite some time and finally did it! I must admit it took me a few times to get it right. I used the Cricut Embossing Folder Kit.

Step 1 - I set up the SVGs I wanted to use as my emboss. I used all “thank you” files from SVG Cuts. The embossing folder is 5.75 wide x 4.25 high and I came in about a 1/2 inch in from the edge.

Step 2 - Place the Cricut Embossing Sheet on the Cricut Mat and cut 2 times.

Step 3 - Peel off the entire sheet as one piece - a little tricky but it worked out for me.

Step 4 - Now here is the part I struggled with - I was peeling off the entire one side but you only peel off the negative area so that side is sticky and place the entire sheet on the left side of the blank embossing folder. Press this down firmly - they even recommend you run it thru the Cuttlebug to make sure it is sticking.


Step 5 - Take the backing off the positive side. When all done fold the folder up so those pieces adhere to the right side of the embossing folder.


Step 6 - Emboss away!

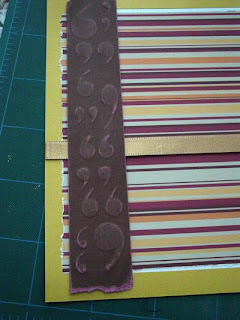
Here is a card I made with the “thank you” embossing folder. I've embossed using this about 20 times and it is still staying intact.


I used DCWV & AC Cardstock and Creative Charms Gradient Pearls along with a ribbon to accent.

If you decide to make your own embossing folder or if you have already done so please email me a photo - would love to share!

Hope you are enjoying your Memorial Day Weekend!

Tuesday, June 29, 2010

Wedding Invite Collage

I had a wedding shower over the weekend. The bride designed her own invites so I knew she would appreciate one of my wedding invite collages. Her color is Tiffany Blue and she will be wearing her Mom’s headpiece that has daisies on it.


I cut the flowers on the Cricut using SVG Cuts 3D Mums and Fall Flowers Digi Cart. I am loving my Cuttlebug embossing machine. I embossed the centers of the daisies. The light blue is a piece of vellum I put through the Cuttlebug and it all sits on an embossed white paper. Swirls are from the Swirlies Digi Cart.


When the bride-to-be opened the collage she exclaimed “Oh My God” so I am happy that she was happy!

Amy

Thursday, March 11, 2010

Zoo Layout

I went to an all day crop this past weekend and caught up on some 2008 pages. I got 7 pages done! This was a trip to the zoo. Noticed they are having a challenge over at Practical Scrappers to use white pen and I used it on this layout.


I hightlighted around the edges and the title arrow. Here’s a closeup.


I created the animals from clip art I downloaded from DragonArtz Designs (just added a rectangle around them) and embossed (my latest favorite technique).


Have a trip to the Zoo planned? Here is the title in SVG format for SCAL or MTC. Click here to DOWNLOAD.

Monday, November 23, 2009

In Their Words

My boys have some fantastic quotes and questions and wanted to capture them on this layout. I'm on the design team for a local scrapbook store called the Crop Shop and the challenge was to use Core'dinations Chocolate Paper. I really liked how sanding the embossed elements look with paper but I do not have an embossing gadget. I remember doing hand embossing in art school, did a test and worked like a charm!

Here is my final layout:

Here is the quote SVG if you'd like to give this a try. Click here to DOWNLOAD.

Here is tutorial on how I did the hand embossing:
STEP 1: After you create your image in Illustrator select art and choose reflect tool. (Please note - do not do real detailed art - keep it on the simple side)

STEP 2: Select Vertical Reflect and Copy.

STEP 3: Print the reflected art out on your printer.


STEP 4:
Cut the original art out on the Cricut using chip board. (I use cereal boxes - and set cutter to 3X in SCAL)
STEP 5: Attach chip board to the right side of the paper (the side you want to "pop out"). Place in the corner for easy positioning & tape in place.

STEP 6: Trim the mirror image that you printed out to size.

STEP 7: Turn paper over and attach mirror image to same corner. This printout is just a guide to show you where you need to emboss.

STEP 8: I just used a pen without the point. Using your printout as a guide you have to feel for the edges of chipboard and trace around and also emboss on the inside of the object. Press hard but don't tear thru.

STEP 9: This is how it should look from the bottom side of the paper.

STEP 10: This is the final embossed panel. I tore the top and bottom and sanded on my embossed areas to reveal the core color.

This paper is awesome. I also used it for the title and frames around the quotes and printed the quotes out on the back of the paper. Please let me know what you think of the tutorial, hope you give it a try!