Tuesday, December 29, 2009

Cutting Chipboard

I've had a few people ask me about cutting chipboard on the Cricut. I do this all the time. I like to add dimension to my pages and collages and here is how I do it.

STEP 1 - Cut the front and back from your cereal boxes.

STEP 2 - Apply to mat so inside is facing out.

STEP 3 - Load mat into Cricut.


STEP 4 - Under "Cutter" menu choose "Multi-Cut" "3 Times". You'll have to experiment with this. If you have a new blade you may be able to get away with cutting 2X and some materials are thicker than others. For this cereal box I cut 3X, some others are a bit thinner and you can get away with 2X cut.


STEP 5 - Select "Cut".


STEP 6 - Now you have a chipboard shape. Cut the same shape out of patterned paper. (Remember to turn off Multi-Cut). Adhere to chipboard and ink around the edges.


STEP 7 - Add some adhesives to the back to add dimension to your page. On this layout I added to the cross and the squares/rectangles.


STEP 8 - I assembled the rest of the layout and added some Gradient Pearls from Creative Charms.


Please note: I would not recommend cutting small intricate shapes from chipboard. You will have to experiment with it. Give it a try!

If you'd like the SVGs for this project please see previous posting from 12/28.

Monday, December 28, 2009

First Holy Communion

I wanted to get a jump start on a scrapbook page for a First Holy Communion coming up in the Spring. I used one of my photos from my nephew's graduation as inspiration for the cross.

Here is the image:


Here is my page. This would also look nice in a 12 x 12 shadowbox frame.


Here are the elements from the layout, click here to DOWNLOAD.

For the cross only SVGs click here to DOWNLOAD.

Stop by again - I've had quite a few inquires about cutting chipboard on the Cricut. I will give you step by step instructions on how to do it and show you the steps to make this First Holy Communion layout.

Saturday, December 26, 2009

Merry Christmas!

Hope you had a great Christmas! We sure did at our house! I whipped up some gift card holders minutes before the guests arrived and here is one of them.


Thursday, December 24, 2009

Basilica Inspiration

Hope your holiday preparations are going good. We had our annual Santa party (the big guy comes to visit our house every year) and now getting ready for Christmas Eve dinner.

I went to my nephew's college graduation last weekend and took a bunch of photos of the basilica. Here is a photo I took of the back of the church.


And here is the SVG I created. I switched it up a bit. I plan to use this on a card.


If you'd like the SVG of the Round Graphic click here to DOWNLOAD.

Tuesday, December 22, 2009

Making A Baby Name Collage

When my great niece was born 2 years ago I was into quilting and I created this quilt for her. Now that I am into scrapbooking and creating with paper I made her a Name Collage for her room. I matched the colors of the quilt and picked up some of the elements from the quilt like the butterfly.

Here is the quilt that I made:


And here is the collage (it is not in the shadowbox frame):


Thought I would share how I create the collages. They make a wonderful shower gift! Let everyone else buy from the registry and you can share your creativity with one of these!

STEP 1 - I roughly layout the collage in Illustrator or you can use any drawing program or sketch it out on paper.

STEP 2 - For text create outlines and take elements into a 12x12 (or 6x12) Illustrator page. Cut elements out of chip board 2 times. (I use cereal boxes).

STEP 3 - Cut same elements of patterned paper. (remember to take off 2 times cut)


STEP 4 - The shadowbox frame has velcro on it - I flip it over and use the other flat side.


STEP 5 - Add the background papers.


TIP: Use the cutouts from elements as masks - place them down and ink inside them for a subtle shadow on your paper.


STEP 6 - Adhere letters to the chipboard and ink the edges.


STEP 7 - Attach foam squares to bump letters up. I tried foam core on this project and it worked perfect - bought a huge sheet. You'll want the letters at different levels.


STEP 8 - Add other elements. For example I add a frame on the right side to insert a photo of the child.


STEP 9 - Embellish it! I used Creative Charms gradient jewels all over this to add some sparkle.


So give it a try and your gift will be the hit of the baby shower!


If you'd like a SVG of the butterfly that I created to match the quilt click DOWNLOAD.

Sunday, December 20, 2009

Primary Creations

Ever wonder what to do with all the artwork your little one's create? I did a layout that featured both of my son's wonderful creations. The title is "Primary Creations". I used an assortment of papers from the Lime Rickey line by Basic Grey along with stitching and inking.


I had the frames in my SVG collection - most likely from the Craft Edge Forum so I can't share those. I do have a tip to share. I just had the Baby Bug at the time so to cut my circle I took a plate and layed it on my paper and cut around the edge using an exacto knife.

Now go take all that art off the frig and scan it in or photograph it!

Thursday, December 17, 2009

A Singing Layout

I did this layout for the SVG Cuts December Challenge. I used a free swirl SVG from last week on this layout. I added some stitching around the edges and the photos. It also features some Creative Charms embellishments. I will feature photos of my boys in their Christmas Eve PJs. They go to bed extra early that night because Santa will be coming!

I recylced a singing card on this layout (Here Comes Santa Claus...). You just lift the flap and the tune plays. I added the journaling under the flap along with a photo of the tree (it is on the inside of the flap).


If you'd like to see a video how the card works with the layout check it out on utube.


If you like the "Here Comes Santa Claus" title click here to DOWNLOAD.

Wednesday, December 16, 2009

One Sick Boy

I've been at Children's Hospital the past three days with my youngest son. He had cysts that we just discovered and needed to be removed. He was a trooper thru all the many tests and surgery and now we are all glad to be back home! Be back soon with more creative projects!

Amy

Monday, December 14, 2009

BFF Word Book

Yay! I have upgraded to SCAL for Mac 2.0. Liking the layers feature and type really seems to be alot easier to work with in 2.0.

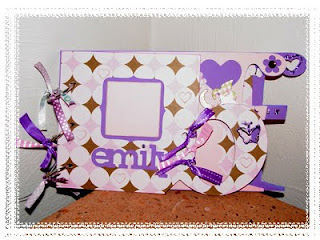
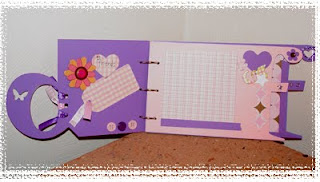
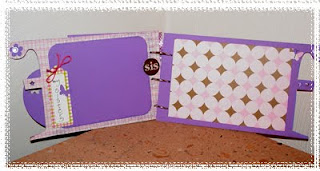
Here is a BFF (best friends forever) Word Book. I made this for our friend's 9yr old daughter. This is my first word book. I have some ideas for some other ones and hope to work on some soon.

Here are a few images of the word book.


I have a few tips if you haven't created a word book before.
1. Cut the first layer out of chip board (I use cereal boxes). Under "Cutter" select "Multi-Cut" and select "2 Times".
2. Cut the same file using your background paper (remember to take off multi-cut) and adhere to the chipboard.
3. Select the image and click on "Flip Horizonal" and cut this. This will be the back of the first layer, adhere to chipboard.
4. Repeat for remaining layers.

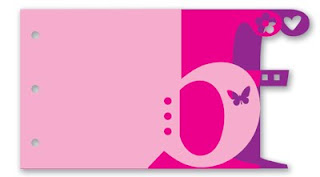
Here are the elements for the bff word book.
If you'd like the SVG click DOWNLOAD. (all three layers are in one file)
If you'd like the SCUT click DOWNLOAD. (separated as layers in SCAL2)

Since I am new to SCAL 2.0 please leave me a comment if you have any issues with the files.

Saturday, December 12, 2009

A Special Offer from Creative Charms


Shop www.creativecharms.com

and receive $2 OFF A $10 Purchase
when you shop from now through 1/15/10. Use code: CCDT

Want to win $40 worth of Creative Charms products FREE?
Just visit www.creativecharms.com & sign up for E-Specials by January 1, 2010. You will become eligible to win $40 worth of Creative Charms products. Creative Charms will hold the drawing and announce the winner on our website on January 3, 2010. (No purchase necessary).

Thursday, December 10, 2009

Family Tree

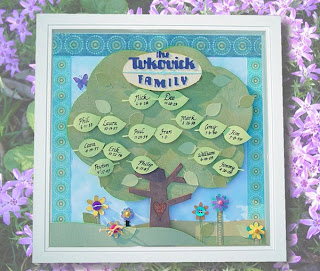
I created this family tree for an Anniversary Gift. It would also make a great gift for Grandparents or Parents - for those hard to buy for people that have everything!

Here are detailed instructions on how to make this collage:

Getting Started - There are two options for your final product. Option 1 is inserting the family tree into your scrap book. When applying pieces to your layout you can add some dimension using adhesive squares. Option 2 is purchasing a shadowbox frame (JoAnn’s has these) and inserting your final piece into it. If you plan to insert into a frame you can add dimension by stacking adhesive squares.

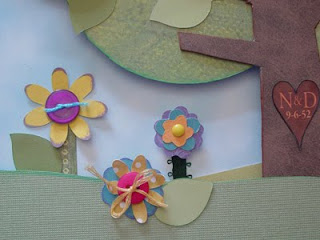
Please note: If using a shadowbox frame you will need to bring your raised pieces about 1/4'' in from the edges (see photo) to accommodate the lip on the frame. For this project this will be the trunk and front grass piece.


STEP 1 - Mount the cloud paper on card stock supplied with shadowbox frame. Apply side and top strips.


STEP 2 - Apply bottom layers of grass.


STEP 3 - Apply tree. Please note: feel free to add some adhesive squares if you would like to bump this up.


STEP 4 - Apply trunk. Once again add some adhesive squares if you would like to bump this up.


STEP 5 - Assemble and apply the flowers. Tip: Try inking the edges.


STEP 6 - Apply front grass piece. On my sample I applied adhesive squares to add dimension.


STEP 7 - Add the butterfly. Tip: add some antennae with a fine point pen.
Add the oval for the family name. You will need to add the name using letters cut from a die cut machine or stick on letters. Or you can add "Our Family" title.


STEP 8 - Add names and birth dates and attach large leaves. You can do just parents or parents & grandparents. Sample shows both parents and grandparents. I cut these leaves slightly larger than the other leaves.


STEP 9 - Add names and birth dates to medium leaves. I overlap the couples and put their children under them. Tip: You can add square adhesives to all leaves or just parents/grandparents.


Additional Notes:
If this is for an anniversary I add a heart with wedding date to the tree trunk. I print this out on my color printer, trim and mount it on the trunk. See photo. You can use inks to color your edges of your leaves and flowers if you like. Put some extra leaves in a ziploc and attach to the back of your layout or frame for any additions to the family!
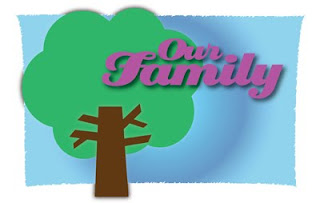

For the tree, trunk and "Our Family" SVGs click here to DOWNLOAD.
(The leaves were from Accent Essentials cartridge).