Sunday, December 21, 2014

Merry & Bright


Here is my finished Merry & Bright Canvas. I used the Christmas Phrases from Miss Kate Cuttables and the Fair Isle Background. 
I added a shadow to the phrase and cut in the white vinyl to give it some pop.

Stop on over to the Miss Kate Cuttables store to check out their sale.


I decided to play along with the SVG Cuts Christmas Challenge.

I made these super cute gift card holders. 


The houses are from the Cotton Tail Village SVG Kit. I used the decorations from the Christmas Cheer SVG Kit.
The small box at the bottom is the free ATC Box and I reduced the height slightly.


Have you picked up this free kit from SVG Cuts? Head on over to their site!
They also have a 12 days of Christmas Giveaway.


Have a great week! Amy

Sunday, December 14, 2014

Baby It's Cold Outside

Hey there! I have a 2 page Scrapbook Layout to share with you today. 
I just love using Miss Kate Cuttables for layouts. 
The titles are absolutely amazing and the paper piecing is so fun. 
Here's a look at the Baby It's Cold Outside Title:


I popped off the title with some foam tape. 
The journaling was done using the Cameo Pen Tool. I love journaling with this tool.


I used the recent freebie from 12/12/14 called Fair Isle Background to create borders for both layouts.


Here is a look at the file. I just took a section of the file by ungrouping and cutting on my Cameo.


It does leave quite a few pieces and parts on the mat when you cut. 
I have a tip - I pull out my Pampered Chef scraper to clean up the mat. Works like a charm!


I also used the Fair Isle Background to create a canvas sign. The patterns work perfect for vinyl.
I first painted the sign with acrylic and plan to apply the vinyl as border. 
The Merry & Bright is a title from Miss Kate Cuttables - Christmas Phrases.
Here is a sneak peek - stop by in  a few days and I'll share my final creation.


Thanks for stopping by today! 
Amy

Sunday, December 7, 2014

There's No Place Like Home for the Holidays

It's beginning to look alot like Christimas at my home. 
I made this super cute sign using a chalkboard sign. 
I cut the pattern from SVG Cuts Christmas Gifts Vinyl SVG Collection from vinyl. 
I placed the vinyl on the chalkboard and painted it white with a foam brush. 
I also painted the frame and added some twine around the border.


I used this kit for another project.

 I recently took a cookie class hosted my brilliantly creative cousin Janet.
Visit her Roll Your Own Cookie Facebook Page here.
She had all the cookies baked and ready to decorate. I learned so many techniques and it was a fun day. 

I decided to take along a few stencils which I cut on my Cameo.
I just used acetate from the art store. 
I used the same kit called Christmas Gifts Vinyl SVG Collection.


Here is the pattern on a beautiful tin from the kit.


Here are some of the other cookies I made during my class. 

The top left is an embroidery style, and the top right, bottom left were
hand painted. I used a food safe pen to creative the bottom right.


These Thanksgiving theme cookies were fun to create too!
I especially like the marble technique on the leaves.


Hope your Christimas preparations are coming together nicely.
Thanks for stopping by.

Amy

Monday, November 10, 2014

Penguin Shadowbox

Hope you had a great weekend. I went on a scrapping weekend called Crop Around the Clock and had a great time.

I have a cute Penguin Shadowbox to share with you today. I have done so many of these over the past 5 years. I usually match the color scheme and theme of the bedroom.


This little girl has a penguin themed room.
The cute SVG from Miss Kate Cuttables worked perfect.


The font for this one is called SNF Classy Charm - I picked it up in the Silhouette Store - ID #8752


I did three offsets of the font to get the layered effect. I used foam tape in between the purple and white layer to add dimension.  I featured three photos of the little girl who was turning one.


Hope you liked my project - if you are new to my blog and you'd like to see more shadowboxes (there are alot!) Just use the search feature to the right---------->

Thanks for stopping by today, Amy

Saturday, October 25, 2014

Pick of the Patch Sign


1 Week Until Halloween! In my last post I tried canvas for a sign and on this one I tried wood. First I painted it orange. Then I cut vinyl to use as a stencil.

and the type from


these are both from Miss Kate Cuttables.


After I applied the stencil I painted the black portion. I love the look of distressed wood and after much debate I decided to give it a try. I just sanded the edges and ran the sand paper over the entire sign. 


Thanks for stopping by ~ hope your Halloween week is a great one!

Amy


Sunday, October 19, 2014

I'm back! Halloween Canvas Projects

Wow! It has been almost a year since I last blogged. Life has just been busy! I did move over the summer and now have a wonderful craft room to create in. Now that I am settled into the new house...I thought - why not start up the blog again?

I'm still scrapping and creating shadowboxes cutting SVG files on my Cameo. I've also gotten into vinyl projects. I am a member of the Happy SIL site! FB page along with Silhouette SD and Cameo Users and that's where I learned about PVPP.

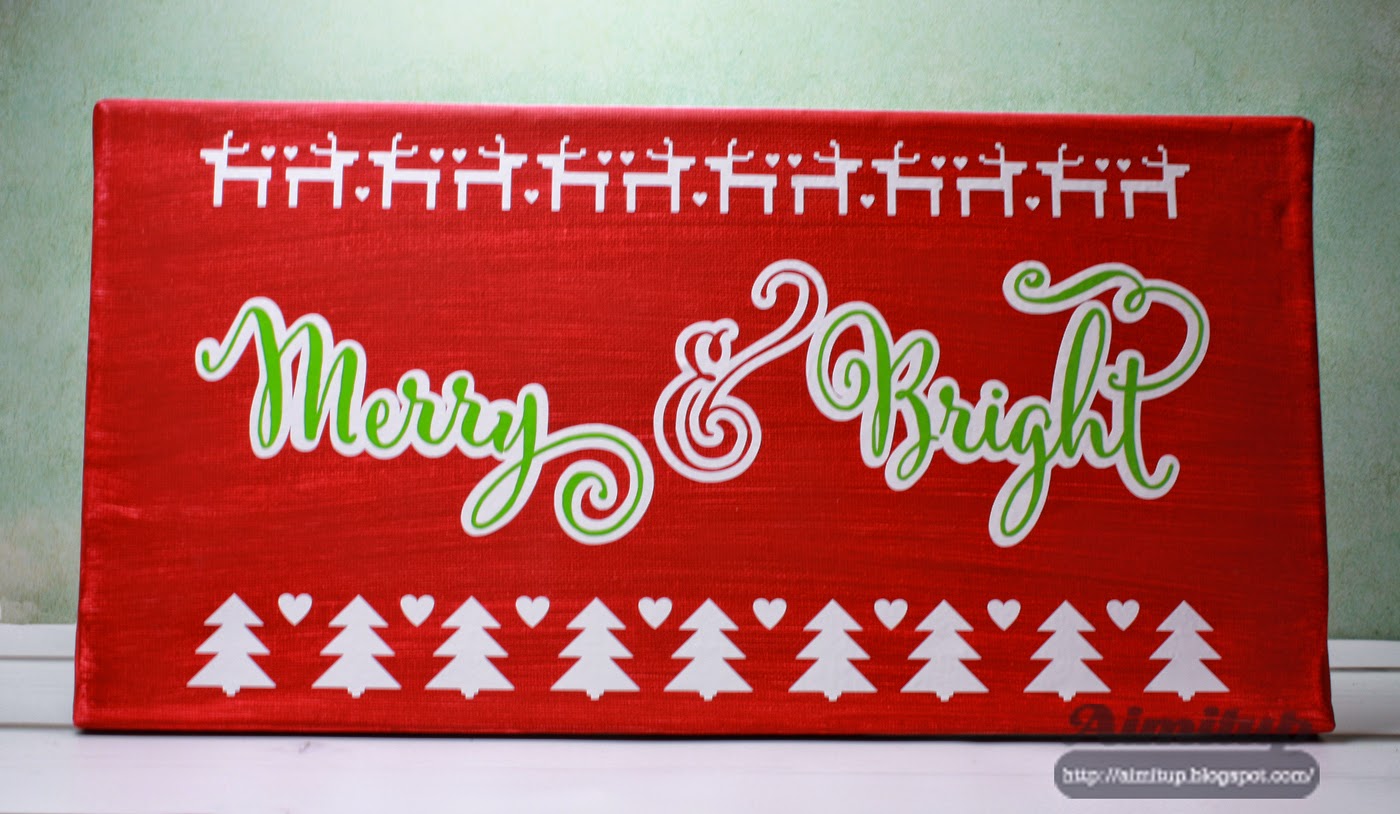
PVPP stands for: Paint, Vinyl, Paint and Peel. I been having a blast with this technique. Here is one of my finished pieces:


Here's a quick tutorial: Step 1 - Pick up a 14 x 7 canvas at Walmart (2 for $7), along with some acrylic paint and a foam brush. Apply the paint to the canvas. I mixed yellow, orange and brown for mine. For the Happy Halloween canvas I mixed, green, yellow and blue.


Step 2: Select your design and cut your design on the Cameo using vinyl. I used the Halloween Titles from Miss Kates Cuttables. These were a freebie and now available in the store.


Step 3:Apply vinyl to the canvas after paint has dried. The vinyl acts as a stencil. Apply the black paint to canvas with a foam brush. I also masked the edges with blue painters tape and painted. It helps to finish off the canvas.


Step 4: Once the paint is dry remove vinyl and you are good to go!


Miss Kate Cuttables has a freebie everyday. You will need the Designer Edition to cut these SVGs on your Cameo.


I'm excited to blogging again ~ I'll be back soon!
Amy