Showing posts with label Inking. Show all posts

Sunday, May 23, 2010

Bo Bunny Mom's Day Layout

When Cathy from the Crop Shop gave me my design team assignment I could not wait to get my hands on the Bo Bunny Jazmyne line. I follow the Bo Bunny blog and I've been admiring the awesome projects created with Jazmyne.

Bo Bunny has a sketch challenge. It is a two pager that I adapted to a single page layout.


I used a variety of Jazmyne, and Bo Bunny Dot. I stitched the background square and around the scalloped edges. I don’t usually use the stickers for titles but loved the colors and style of this one.


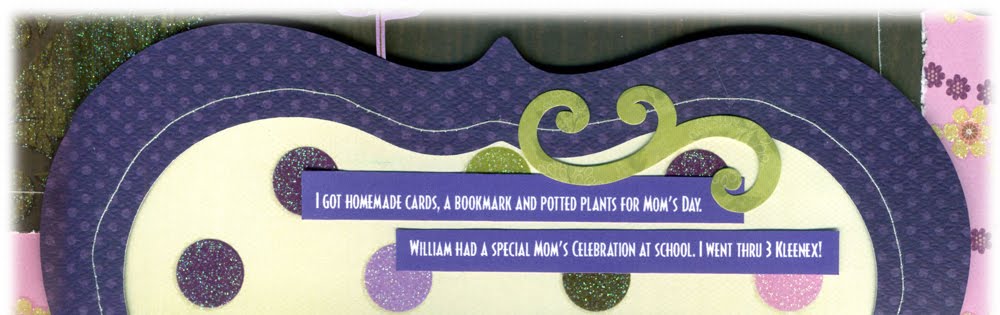
This page is all about my great Mom’s Day. I got lots of homemade goodies that I will treasure forever. My oldest son had a celebration for Mom’s at his Kindergarten class. I almost went through a whole box of Kleenex! I am so lucky to be a Mom :)

Sunday, April 11, 2010

North Pole

I know it is Spring and winter is finally over. I had one page to scrap from 2008 (to finally catch on scrapping!) and decided to finish it up. We took a ride on a real train to the “North Pole” to drop off letters to Santa.

I saw this sketch on the Just Us Girls (JUGS) Challenge Blog:

1. I rotated the sketch • 2. Put scraps of paper down for my outside border • 3. Cut & inked the background from SVGCuts Winter Bliss DigiCart using SCAL on my Cricut • 4. Cut the title - font is Improv • 5. Layered papers and elements from TPC • 6. Finished off with Stickles on the trees and Creative Charms Gem Brads & Winter Medley Snowflakes.


Thought I would never catch up but it took just one trip
to the “North Pole” to finally catch on my scrapping!

Friday, April 9, 2010

Baby Shower Invite

I created this Baby Shower invite for a friend.
It is a Diaper shower and I found a cute saying on the internet:

To add a little extra glee
and help the parents-to-be,

Please bring a little extra from the heart.

A pack of diapers (any size) & wipes,
To give them a good start!


I used SVG Cuts freebie for the diaper pins - it is from 10/17/09.

I printed the wording on my computer -
trimmed out in a circle and mounted to the polka dot paper.
Rounded the corners, added the cut and inked around the edges.


Wednesday, February 24, 2010

Bo Bunny Abbey Road Layout

I received my design team assignment from my local scrapbook store, The Crop Shop. Bo Bunny - Abbey Road. I love Bo Bunny and checked out the line on their site. I discovered the Bo Bunny blog that features awesome projects and challenges.

Here is a Sketch Challenge taking place:


Here is my Abbey Road Layout:

~ LEFT SIDE ~


~ RIGHT SIDE ~


~ CLOSE UPS ~


Circle elements are from Accent Essentials and font is Plantin Schoolbook.
Embellishments from Creative Charms.

Stop by tomorrow for details on the Origami Flowers.
I tried these for the first time on this layout and now I am hooked!

Thursday, February 18, 2010

Split Negative Challenge - JUGS

When I saw the challenge for JUGS (Just Us Girls) I knew I wanted to jump in on this one. I created this wall hanging for a friend of mine. She is expecting her first baby.


This is a split negative technique I used.


Here are the details:

Step 1 - I stamped one side of the butterfly swirlies. Black on white paper.


Step 2 - Scanned in and took into Photoshop. Under Image-Adjustment-Curves I dragged the points to opposite corners to create the look of white stamps on black paper. I then Flipped the Canvas Horizontal of the initial scan to get the mirror image. Printed both out.


Step 3 - Created the butterfly image and cut out of chipboard (cereal box) on the Cricut. Mounted the printouts to this and inked the edges.


Step 4 - Since I already had the stamped images digitally I placed those in Illustrator and created the cutouts around the stamped areas using the pen tool.


Step 5 - I cut the plain black and white paper using the butterfly with the cutouts and also cut a chipboard version. I spray glued the white and black paper to the chipboard for the top layer. Inked the edges.


Step 6 - I added some dimensional tape to the back of the top layer and applied to the bottom layer. Added the center of the butterfly.

Step 7 - Added embellishments from Creative Charms and a ribbon to hang it. I hand wrote a special note on the back using a white pen.


Please send me an email or leave a comment if you'd like more details. My tutorial is just the basics but hope it helps. It really was a fun project and I'm sure I'll be using this technique again!

Sunday, February 7, 2010

An Apple A Day...SVG

Someone over on the Craft Edge Forum was looking for an apple cut in half so I made it in Illustrator, cut it, inked it and created a card.

Here are the elements:
Here is the card:

Here is an image of the apple:

Cool thing about this apple - no paper piecing the seeds! It is designed to layer on top of the black and the seeds show thru.

If you'd like the SVG click here to DOWNLOAD.
I've included a JPG of the apple in the ZIP file so you can see the piecing. Just import the SVG into SCAL or MTC and you are good to go.


Thursday, January 21, 2010

SNOW Layout

Here is a layout I did for my local Scrap Book Store, The Crop Shop. I'm on the design team and the assignment was papers from TPC (The Paper Company) Studio. The papers were wonderful. I used Let It Snow, Flurries & Swirl. This layout also features Winter Blues Sticker Sheet. I also used Core'dinations Navy and a Gray Card Stock.

I am also submitting this layout for the Fussy & Fancy Friday Challenge - Winter Theme.


This layout features silver and blue inking. I wasn't sure how the ink would work on the stickers but they worked great. The SNOW type is from the sticker sheets.

I did a bunch of layering on the SNOW title - here is a closeup of all the layers and a close up of the final title.


Thanks for stopping by!

Thursday, January 14, 2010

A New Couple & New Home

I'm joining in on another challenge over at Fussy & Fancy Friday Challenge. The challenge was to inc0rporate NEW into the project.

This is a collage I did for a wedding gift last fall. It matched the couples color scheme and fit into a 12 x 12 shadowbox frame. It would also work well for a wedding scrapbook.


Here is closeup of the little house and tree:


I thought I would use the same house and tree for a New Home Card. The card was small so I printed the images on my printer, trimmed and inked them. I'm not totally liking this card but after I added the black pen details liking it a bit more.


You may recognize the scalloped border on the card - it is the 6 x 12 border from this post. I knew there would be alot of uses for those scalloped borders.
If you would like to download the elements in SVG format click here to DOWNLOAD.

If you'd like a hi-res JPG of the elements like I used on my card click here to DOWNLOAD.

Thanks for stopping by.

Saturday, January 2, 2010

Happy New Year & a Bday Card

Wishing you a Happy New! We have been under the weather at our house - thought we were going to avoid it this holiday season but no such luck.

I plan to make cards for Birthdays this year. I have my sister-in-law's birthday coming up tomorrow and I made her a card. I do not consider myself a card maker but had some fun stitiching and inking on this one.

I cut a bunch of swirlies from SVG Cuts Swirlies Collection and put some double stick tape on them. I inked the background paper with silver ink and got a subtle background. Love this collection, check it out here.


Here is how my background paper turned out:

Close up of the card showing stitching:


Final card with Creative Charms flower and pearls added: