Showing posts with label Stitching. Show all posts

Tuesday, August 29, 2017

Miss Kate Cuttables Die Cut Fun!

Hello there! I have a special post today. The entire Miss Kate design team is creating with the Paper Diecuts. Everyone's projects are amazing and there are so many diecuts to select from.

For my project I created a Halloween layout featuring my Pirate and Boxer from 2016.


Here is my layout:

This layout went together really quick! I started out with stitching around the edge of my cardstock.
I then added the inked patterned paper to the top third of my page.

I then arranged the photos and diecuts.
I used foam tape to pop off the diecuts.


I added my journaling and a few buttons.

Using elements in threes is something I like to do. Can you spot all the 3's?
- 3 photos
- Layout divided in 3's from top to bottom
-3 bats
-3 ghosts
-3 buttons
-3 journaling strips


Now you have to go check out the rest of the design team projects! They are all featured on the Miss Kate Blog and links are provided for each designers blog.

Thursday, May 31, 2012

Sew Fun! Stitching on Paper

Hey all! Over on the SVG Cuts Facebook Wall a discussion was started by Deb of Deb’s Crafty Side. She and others were asking about stitching with a sewing machine on paper. This is a really fun technique and adds a perfect touch to projects.

Here are a few tips:

  • Do not stitch thru adhesive - either add adhesive to the sections you do not plan to stitch or stitch and then adhere the stitched piece to your project.
  • Deb asked if you can stitch two pieces of cardstock together - sure! I have not done more than two layers though.
  • Try some different stitches. I inherited by machine and it only does a straight stitch - I plan to get a new one so I can do zig zag and other stitches.
  • One great thing about stitching on paper is you don't have to be exact. If I was sewing a dress I'd be nervous my true sewing skills would be evident and it would fall apart while I was wearing it. You are just sewing paper so you can be adventurous. 

Here are a few projects I have stitched on:


a few closeups (click on image to closer look):


Stitching on scrapbook layouts is a nice touch.


Need some additional sewing inspiration? Check out Thienly’s latest DT Project for SVG Cuts that feature stitching. Need an example of a card with stitching - Check out Thienly’s Card here. Check out Tamara’s gorgeous project for some stitching. Here is a card from Tamara with some great close ups of her awesome stitching.

If you have some stitching tips please share under the comments section! happy stitching!

Sunday, May 23, 2010

Bo Bunny Mom's Day Layout

When Cathy from the Crop Shop gave me my design team assignment I could not wait to get my hands on the Bo Bunny Jazmyne line. I follow the Bo Bunny blog and I've been admiring the awesome projects created with Jazmyne.

Bo Bunny has a sketch challenge. It is a two pager that I adapted to a single page layout.


I used a variety of Jazmyne, and Bo Bunny Dot. I stitched the background square and around the scalloped edges. I don’t usually use the stickers for titles but loved the colors and style of this one.


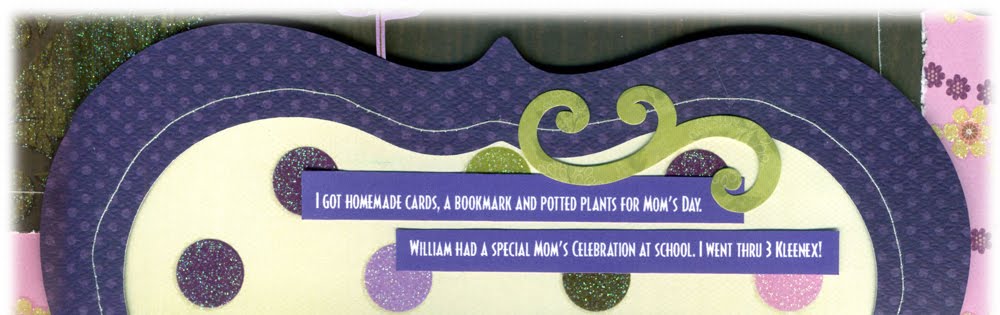
This page is all about my great Mom’s Day. I got lots of homemade goodies that I will treasure forever. My oldest son had a celebration for Mom’s at his Kindergarten class. I almost went through a whole box of Kleenex! I am so lucky to be a Mom :)

Saturday, March 13, 2010

Scrappin Collage

I made this Collage for my Scrap Area. I was on a roll one night and created it in a few hours. It is designed to fit a 12 x 12 Shadowbox Frame. They sell these frames at Joann’s or Michael’s. I used the ribbon as my color scheme throughout.

Here is the collage:


Here are some detail shots:


A majority of the files are from SVG Cuts.
If you see a particular cut and want to know which collection it is from just send me an email. am220099@gmail.com


Have a fantastic weekend!


Saturday, February 20, 2010

Bo Bunny Card Challenge

I love Bo Bunny papers and decided to try out their Card Challenge.
The challenge was to use the following color palette: Red • Pink • Aqua

I wanted to make a card for my sister-in-law's mom and she loves to quilt. She is so talented and can whip up gorgeous quilts in a few days.

Here is the quilt block:


And here is the card:


Bo Bunny Papers used:
Wild Berry Red Dot • Bashful Dot
Alissa Spunky • Delilah Stripe • Abbey Road

I thought I'd do a quilt block pattern. This is called the log cabin. I created a SVG in Adobe Illustrator and used SCAL (Sure Cuts Alot) to cut the pattern. I machine stitched the paper and applied it to the card. I don't think I would have ever picked this color combo but they do look interested together.


If you would like to try the SVG in SCAL or Make The Cut click here to DOWNLOAD.
Please note: Along with the SVG I've also included a JPG that shows the stitching for this type of quilt. You will only need the JPG as a reference.

Hmmm...maybe there are other quilt patterns that I can convert. Let me know if you like this and I'll make more!


Sunday, January 31, 2010

Sketch Challenge - Doodle Dragon Studios

I am loving the digi stamps, especially Dustin Pike's! They are having a sketch challenge on the Doodle Dragon Studios Challenge Blog.

Here is the sketch:


And here is my card:

I used Prismacolor pencils to color the digital image. The papers are TPC (The Paper Company) Studio. The cool frame around the digi stamps is from SVG Cuts - My Moms Attic Collection. I added small dots to the SVG around the edge, cut on the Cricut using SCAL and hand stitched in three different colors. I used embellishments from Creative Charms.

Here is a close up:


Thanks for taking a look!

Friday, January 22, 2010

Hoppy Valentine's Day

I created this card for Valentine's Day. My niece (who is also my son's Godmother) loves frogs so I'm sure she will get a kick out of this one. I wanted to make it look like the frog on the right hopped right off the card into the inside.

I used the FREE SVG from SVG Cuts for the frog. His name is Fritzie The Frog. If you haven't already signed up for the FREE SVGs from SVG Cuts you should go do that now! Their cut files are awesome.


The eyes are from Creative Charms - Black Gradient Pearl Stickers.

I used the scalloped frame that I made last week with the swirly heart but this time I added small holes so it made the hand stitching easy and so uniform.


Want the SVG for that? Click here to DOWNLOAD.

And don't forget to head on over and download Fritzie!

Tuesday, January 19, 2010

Baby Name Collage & Technique

Here is a recent Baby Name Collage I did. I donated one of these at our church bazaar. The winner recently had her baby and called me with the name.


Here is a closeup that shows some stitching and you can see part of the bumble bee's path above the C Block.


Here is a picture of her quilt and I matched it along with the colors of the room: Sage Green, Browns and Tans.


I wanted to do a path for the bumble bee like the quilt but I did not want to glue down a bunch of small pieces. I did a cut of the bumble bee path on the Cricut and used the cut as a stencil. Here is how I did it:

STEP 1 - Draw the line in Illustrator using the pen tool.


STEP 2 - I gave it a stroke of 5pts and clicked on Dashed Line and put in 12pt/10pt for the Dashed Line.

STEP 3 - Click on Object - Path - Outline Stroke.


STEP 4 - Click on the initial path and delete it so all you have is the dashes - check it in Preview mode to make sure you just have the dashes.


STEP 5 - Save as a SVG and import into SCAL. After you cut it you can use this as a stencil for the bee's path. I used an ink pad to color in the stencil.


I'm not thinking many of you would need a SVG of a bee path but you never know. Email me if you don't have Illustrator/Inkscape and I'll send it via email if you would like it for an upcoming project. Thanks for stopping by!

Thursday, January 7, 2010

Valentine's Card

I was playing with the SVG Cuts Swirlies Collection and created this card. The outside features a cut on Core'dinations paper. I tore the bottom of the paper to reveal the core color. I added ribbon left over from Christmas wrapping. I also added some Creative Charms gradient jewels and hand cut the little hearts hanging from the bow.


For the inside I cut the file called "Sunflower" from the Swirlies Collection. It was designed to have small holes around the inner circle. I added some hand stitching using floss from my cross stitching days and added some gradient jewels. Back in the day I cross stitched so I have every color organized in a handy carrying case. I love to sew so it is fun combining both hobbies.


Thanks for stopping by!

Saturday, January 2, 2010

Happy New Year & a Bday Card

Wishing you a Happy New! We have been under the weather at our house - thought we were going to avoid it this holiday season but no such luck.

I plan to make cards for Birthdays this year. I have my sister-in-law's birthday coming up tomorrow and I made her a card. I do not consider myself a card maker but had some fun stitiching and inking on this one.

I cut a bunch of swirlies from SVG Cuts Swirlies Collection and put some double stick tape on them. I inked the background paper with silver ink and got a subtle background. Love this collection, check it out here.


Here is how my background paper turned out:

Close up of the card showing stitching:


Final card with Creative Charms flower and pearls added: